Showing posts with label andriod. Show all posts

Sunday, 4 November 2012

Tata DocoMo 3g trick for Android

Hi Friends today i am sharing a trick for Tata DocoMo for Android users

Try this trick at  very low balance,this is a simple trick and easy to use ,bt working for Android users only,It is a VPN trick Just Follow the steps below

The Trick:

Signup using the link given beside(Click here for link) ,(on next screen just click on skip ad) then you will get the link to register

 Download "DroidVPN " from Google Play .Click here for link of droidvpn  Install it.

Launch DroidVPN  and now configure it by going to menu>settings then the setting below:-:

Connection Protocol- udp
UDP Port- 9751
Bind Local Port- xx

Now save these setting and leave the rest to its default values.

Lastly just connect DroidVPN using the APN:-- TATA.DOCOMO.INTERNET

just enjoy surfing...............................

Read more ...

Saturday, 18 August 2012

Free PC to mobile call using crowd call

Hi friends this is a new trick which you can use to make a call from PC to mobile for this at
first you have to download 2 files

1 BlueStacks HD AppPlayer Pro (This is an Emulator for Android Application for Windows)
2 CrowdCall 1.0.15 ( Links are below) (This is an Android App which allow you to call other).
link1                            link2                               link3

Features of CrowdCall

  • FREE group/conference calls with people in the US, Canada and over 40 other countries. Super low cost to the rest of the world.
  • Calls are instant – no Signup, no Dial-in number and no PIN number to remember – press the call button and everyone’s phone rings and they are connected.
  • With CrowdCall you have group/conference calls with anyone who has a phone number. They don’t need to have the app to participate in a CrowdCall – they don’t even need a mobile phone!

Steps to do call with Crowd Call

  • Download BlueStacks HD AppPlayer Pro and CrowdCall 1.0.15 from above
  • Install BlueStacks HD AppPlayer Pro and start the AppPlayer by opening Start BlueStacks from desktop or start menu.
  • Now double click on CrowdCall_1.0.15.apk and install it.
  • Now you can see CrowdCall icon on the main screen of BlueStacks HD AppPlayer.
  • Go to settings of BlueStacks HD AppPlayer from bottom right corner and Change App Size of CrowdCall to Tablet
  •  Now come to home screen and open CrowdCall.
  •  From the first screen select your country and enter your mobile number and press OK.
  • Now Close BlueStacks HD AppPlayer window. And Quit BlueStacks HD AppPlayer from TaskBar also.
  •  First of all make sure that BlueStacks HD AppPlayer is completely closed.
  • Now go to C:\ProgramData\BlueStacks\Android for win 7 and copy Data.fs file to safe place as Back Up.
  •  Now feel free to call anyone. Once you get warning of Reached Daily Limit. Just Replace C:\ProgramData\BlueStacks\Android\Data.fs for win 7 with the back upped Data.fs.
  • By replacing file you’re resetting the BlueStacks HD AppPlayer.
  •  Now start calling and have fun as much as you want. No need to reinstall BlueStacks HD AppPlayer ever again.
Note:The Size of Data.fs is 2.00 GB. So keep it safe. It makes your effort and time 95% less
    Read more ...

    Friday, 13 July 2012

    Now Download Google Chrome for iPhone and Android phones


    Now after successful launching of android OS jelly beans for both mobile as well for tablet .This time Google is trying to take the control of market of phones and web browser .Chrome being one of the best browser after Firefox.As Firefox had already launched its application for android and iphone ,Now google chrome is also launched beta version of Google chrome.

    Some Features of Google Chrome beta


    Being one of the fastest browser google chrome shows the same performance on phones too.as we all know google being the best search in the world ,Google chrome is developed such as to maximize compatibility with Google  products like Google search, Google plus, orkut and many more services provided by Google.
    The browser is too fast and very good for web surfing and supports G.P.S navigation with g maps.
    • Search fast
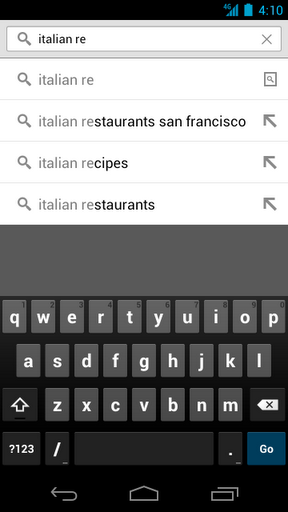
      - Search and navigate fast, directly from the same box. Choose from results that appear as you type.
      -  Browse faster with accelerated page loading, scrolling and zooming.

    • Simple, intuitive experience
      - Open and quickly switch between an unlimited number of tabs. On your phone, flip through tabs the way you would fan a deck of cards. On your tablet, swipe from edge to edge to switch tabs.

    • Sign in
      - Sign in to Chrome to sync your open tabs, bookmarks, passwords, and omnibox data from your computer to your phone or tablet.  Pick up right where you left off.
      - Send pages from Chrome on your computer to Chrome on your phone or tablet with one click and read them on the go, even when you’re offline.

    • Privacy
      - Browse privately in Incognito mode.

    Below are some screen shots taken from the google play website

    https://lh5.googleusercontent.com/-oFFygzKcQ_Y/UAGBH-I0S3I/AAAAAAAADJY/J7CVztwEERw/s512/unnamed.jpg https://lh6.googleusercontent.com/-45YXBoaCVnU/UAGBDLhEVqI/AAAAAAAADI4/-zaEUVS9uUI/s512/unn%2520amed.png
    https://lh3.googleusercontent.com/-iBm3Bt3mXeI/UAGBGCwpyqI/AAAAAAAADJM/tt6dpJuTMo0/s512/unna%2520med.png https://lh4.googleusercontent.com/-jcXGsKtY2ow/UAGBFkVMRtI/AAAAAAAADJE/BECGYfRLQds/s512/unname%2520d.jpg
    https://lh4.googleusercontent.com/-9HIhz7BGbAw/UAGBBr-0M5I/AAAAAAAADIw/XZ5kVBP6Z9U/s512/u%2520nnamed.png
    https://lh3.googleusercontent.com/-RkUJvMpZs9o/UAGBMALJaGI/AAAAAAAADJg/UJFUL-rGQv4/s512/unnamed%2520.jpg
    https://lh4.googleusercontent.com/-HyX-zvtvYDM/UAGBEhSI3ZI/AAAAAAAADJA/Rmc0KxBhdCc/s512/unna%2520med.jpg

      Android watch this video for chrome beta

    Read more ...

    Friday, 6 July 2012

    Screen Capture Full Web Pages on your Mobile

    Meet Web Screenshots, an online tool that will help you capture a full-length screenshot image of any “public” web page with a click.

    While the tool will work across all screens, it is a more handy option for taking screen captures of web pages on mobile devices – phones and tablets – where you often don’t have the option to install extensions.

    Alternatives for Android and iOS


    In the case of iOS devices – the iPhones and the iPads – you can use the Home + Sleep buttons to capture screenshots but a limitation is that it will only capture the regions that are visible in the Safari browser. Web Screenshots will capture the entire web page.

    There’s no standard shortcut* for capturing screenshots in Android devices and sometimes you have to root the phone just for a simple screen capture.

    You can however download the free Dolphin Browser with the Screen Cut add-on on Android and you’ll then be able to screen capture pages directly in the web browser. This is recommended when you wish to screen capture web pages that require login – like a snapshot of your e-ticket or an online payment receipt.
     The Samsung Galaxy series of Android phones do provide a built-in shortcut for taking screenshots. Press and hold the “Back” button and then press the Home key – the screenshot will be saved in your Photo Gallery.
    Read more ...

    Thursday, 5 July 2012

    How to Hide Pictures & Videos on Android

    Have you ever had to lend your Android phone to someone and then hoped that they didn’t look through your image gallery? Maybe they will find some private pictures that you don’t want them to see! Or how about those pictures of you flexing or posing in front of the mirror? That would be kind of embarrassing! There are so many reasons why someone might want to make their photos on their Android device private. Below I will show you the easiest way to hide photos & videos on your Android device:
    Instructions:

    1. Go the Android Market (AKA Play Store)

    2. Search for the app “Hide Pictures in Vaulty” [Market Link]
    3. Click install on this free app

    4. Launch the Vaulty app
    5. Set a password for the app
    6. Enter a security question (in case you forget password!)
    7. Tap the Gallery tab & open a folder

     8. Click on a picture that you want to hide

    9. Click the hide button

    10. Your picture will now be hidden and availabe in the “Vault”
    11. That’s it! Now just launch the “Vaulty” app the next time you want to see the hidden photos.
    Read more ...

    Tuesday, 3 July 2012

    How to Transfer Pictures from Android to Computer

    Have you been using your new Android smartphone as a replacement for your Digital Camera? If so, I’m sure you’ve taken lots of great pictures! Taking pics on your Droid is a lot more convenient than carrying around another camera. But what if you lost your smartphone? Wouldn’t you like to store the pictures on your computer as a backup? If so, just follow the simple steps in this lesson and I’ll show you how to backup your photos and transfer them to your PC.
    Copying pics and videos from the micro-SD Card in your Android device to a computer, allows you to back up and use them on your PC for editing, sharing or viewing. The process of copying photos and videos from your phone to a computer is fairly simple, just follow our step-by-step instructions below to get started!
     Instructions:

    1. Connect your smartphone using the USB sync cable. An USB icon will appear in the notification area of your phone.
     2. On the smartphone, drag the notifications bar down and then tap it. Next tap USB connected, and then Mount.
     3. On the computer, click the START button and then select Computer or My Computer. The micro-SD card in your phone will be recognized and listed as a Removable Disk.

    4. Double-click this removable disk to open it. Double-click the folder DCIM, and then the folder Camera.

    5. From this folder, you can copy all pictures and videos taken with the Digital Camera of your Android smartphone.

    6. To disconnect your Android, just go to the notifications area on your phone and tap on the USB sign to disconnect.

    7. That’s it! Enjoy the peace of mind of knowing that you have a backup of all your pics & videos stored on your PC. In addition, you now have an alternative way to view, share, and edit all of the pics that you’ve taken on your Droid!


    Looking for other ways to transfer the files? How about without cables and via WiFi? Check out one of our other tutorials for more Advanced users: How to transfer files via WiFi from PC to Android (Wirelessly)
    Read more ...

    How to transfer files via WiFi from PC to Android (Wireless)

    In today’s lesson, we will show you how to easily transfer files between Android and your computer. Best of all, we’ll show you how to transfer the files via WiFi without the hassle of having to look for a USB cable or removing the SD card from your Droid. You can follow along on the lesson via the Video tutorial or scroll down to the bottom for the Step-by-Step instructions.
    There’s a lot of different ways to get files to/from your Android device to your computer. But I’ve been searching for the easiest method possible, so that I could teach users of all levels how to do it in a matter of minutes. Luckily, I was able to find a great app that makes transferring files between Android and your computer extremely simple. The app is WebSharingLite [Market Link] and it allows you to connect your Android device and computer together via the WiFi network in your home and/or office. There is no set up needed, just run the WebSharingLite app and it tells you exactly what to enter into any web browser’s URL bar to get there. You’ll then be able to upload/download whatever files you need. File sharing on Android has never been simpler than this! Take a look at the video tutorial below and let us know if you have any questions!

    Video Tutorial
    Step-by-Step Instructions:

    •     Go to the Android Market
    •     Search for “WebSharingLite” app
    •     Install the “WebSharingLite” app by NextApp, Inc.
    • Launch the App and click on the Start button at the bottom left

    • WebSharing will then be activated and you can go to your PC and type in the URL displayed on the screen into your web browser. If prompted, enter the password listed on the screen.
    • That’s it! Start transferring the files you need!
    WebSharingLite not working properly for your device? Try this other great app that is very similar: Wifi File Explorer [Market Link]

    Read more ...

    Monday, 2 July 2012

    Google Nexus 7 Specifications and Price in India

    Google had just launched Nexus 7, a 7” android tablet that is expected to be priced at $199. Google Nexus 7 is targeted to compete with Amazon Kindle fire and so it is manufactured at cheaper price by Asus. Let’s dig into the specifications of Google Nexus 7 tablet now.
    Google Nexus 7 Specifications

    Nexus 7 is manufactured with ASUS chipset inside and its features include NFC (near field communication), Wi-Fi, Google Wallet support etc. Although everything looks good as of now, don’t expect Nexus 7 to be the rival of Apple’s new iPad as the specifications of Nexus 7 seems like it is meant just to be a competitor of Amazon Kindle Fire.

    •     1.3 GHz Quad-core Tegra 3 processor
    •     1GB RAM
    •     7” LCD IPS display screen protected by Corning Gorilla glass with resolution of 1200 x 800px
    •     Android Jelly Bean operating system (Android 4.1)
    •     5 Mega pixel rear camera and 1.2 MP front facing camera for video conferencing.
    •     Price: $199 for 8GB version and $299 for 16GB version of Nexus 7.
    •     8 hours battery life.
    •     microUSB for charging as well as data connectivity medium.
    •     Bluetooth, Wi-Fi, 3.5 mm audio jack, gyroscrope, magnetometer and accelerometer.
    Google Nexus 7 Availability & Price in India
    The Nexus 7 android tablet has been priced at $199 (8GB) and $299 (16GB) in the global market. As of now, it is available in U.S, and it will take some time for Indians to have their hands on this beauty. Nexus 7 in India is expected to be priced at Rs.12-15K (8GB) and Rs.17-20K (16GB).


    Read more ...